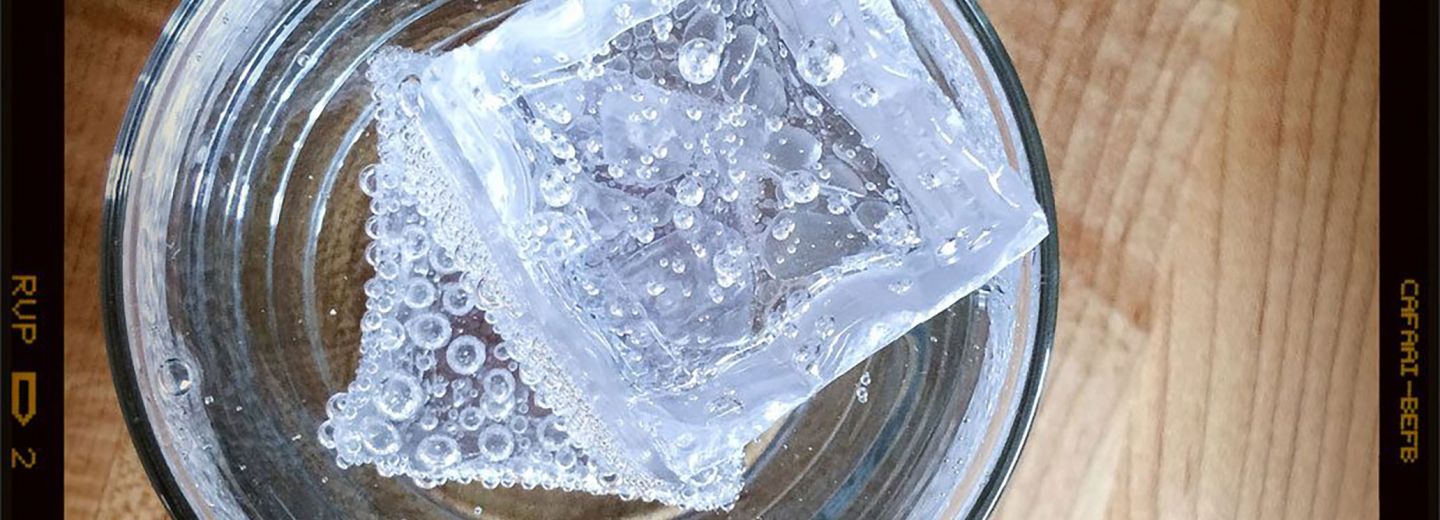
Quick and Easy Tabletop Cocktail Ice

If you’ve ever done any tabletop photography, you know that buying acrylic ice can get expensive. Unless you are a die-hard tabletop professional, the high cost probably isn’t justified. Here is a super-cheap, super fast way to make your own plastic cubes.

Buy a few bags of clear plastic kid’s pony beads and some heavy-duty aluminum foil. The sturdier the better. You can find pony beads at most craft stores like Michael’s and even big box stores like Walmart and Target. They are very inexpensive.
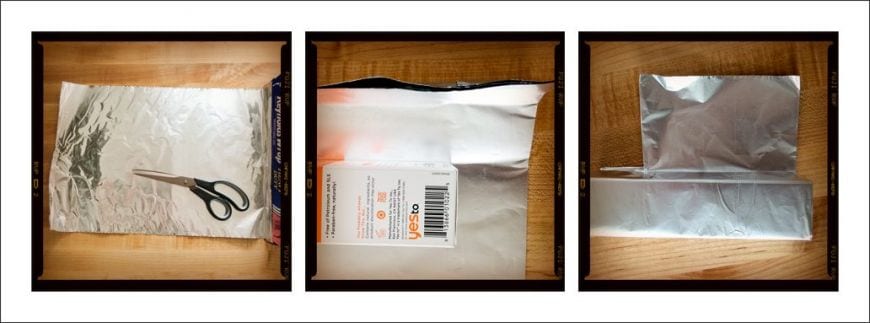
To make traditional cubes, tear off a piece of the foil (roughly 24″). Fold the foil over itself to make a square. Smooth out as many creases as possible. Trim off any uneven edges. Fold the foil around a smooth wooden block (approx 1 – 2″ wide and at least twice as long) if you can find one. If you can’t, you can pretty much use anything with 1-2″ sides. (I just used a box of moisturizer). Smooth out the creases as you go. Once the foil is folded around the block, cut a slit at each of your corners. Fold these tabs down over the bottom of the box just like you’re wrapping a present.
Slide the block out of the foil. You now have a mold! Fill the mold with pony beads. You want to fill it until the level reaches about double the width. So if you are making 1″ cubes, fill the mold 2″ high. If you are making 2″ cubes, fill the mold to about 4″. As the beads melt, the height will come down about 50%.

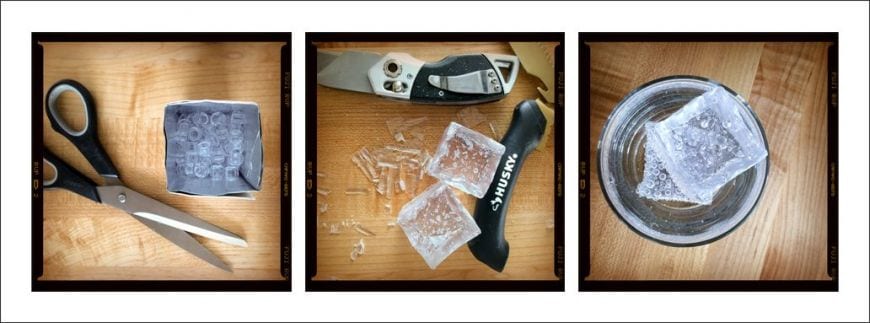
Pop your mold in the oven at 375-400 degrees. Check every twenty minutes and remove when all of the plastic has melted. Different beads have different melting times, so it’s hard to estimate. Just make sure you watch it closely and check it frequently. Make sure your kitchen is well ventilated. Once the plastic has melted, let the it cool completely. Peel off the foil.
Trim off the extra with some heavy-duty clippers. Safety goggles are a good idea. Polish any rough edges with a sanding block or with a little handheld Dremel sander for more precision. Enjoy your new cubes!
You can experiment with more organic shapes too. I just grabbed some chunks of ice from my backyard! Rinse the ice chunks in cold water and wrap the foil around it, keeping the top open (like you are making a sushi hand roll). Work quickly. The ice will melt out of the mold, leaving the impression behind. With practice, you can mimic the look of an icicle, an ice block, or that cool hand-chipped artisanal stuff.


